If you are new to soilless gardening, finding a suitable growing medium can be challenging.
Hydroponic systems use various substrates, each of which has advantages and disadvantages.
Our focus in this article will be on clay balls, also known as clay pebbles, hydroton, and LECA (lightweight expanded clay aggregate).
Many growers prefer using clay balls as an alternative to synthetic substrates due to the organic nature of the material.
In this article, we’ll look at what clay balls are, their pros and cons, and then show you how to make clay pebbles for hydroponics and aquaponics at home.
We want to preface this by saying it is not easy to create your own clay pebbles, as we don’t have a kiln at our farm, and we purchase all of our clay balls (pebbles) from Amazon.
What are clay pebbles?
Clay pebbles, also known as hydroton, are made from balls of clay that have been superheated (in a rotating kiln) to temperatures ranging from 1100 to over 2000 °F.
This process leads to popping, which gives the pebbles their distinctive pores.
Hydroton is a remarkably porous and lightweight growing medium, thanks to the holes and spaces between the pebbles.
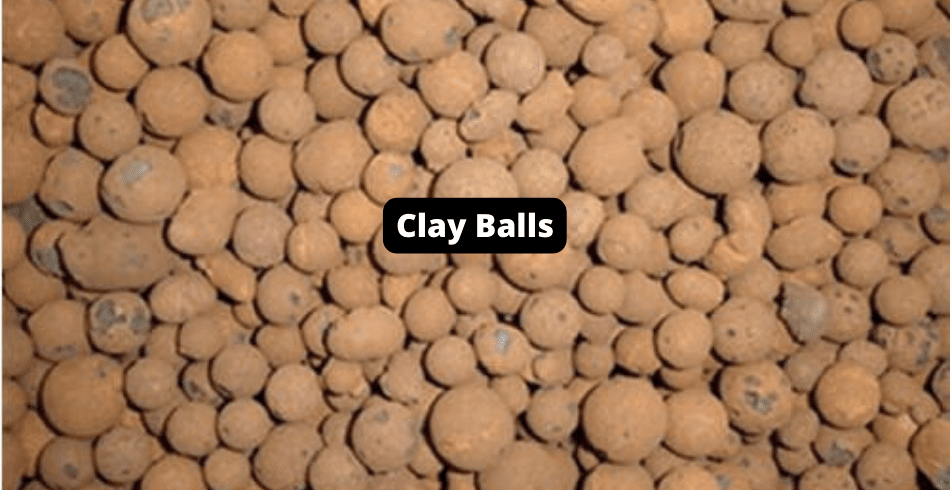
Clay balls are also reusable and are used a lot in both hydroponics and gardening because they have a lot of fantastic qualities.
They don’t affect the hydroponic system’s pH, don’t break down, and don’t add anything to the reservoir’s nutrient solution.
Let’s look at some of the upsides and downsides of using clay balls as a growing medium:
Pros
Ability to retain air
This quality is necessary for sustaining oxygen levels in root systems.
This growing medium has some capacity to hold air bubbles, but it is lower than that of perlite.
When combined with hydroton’s excellent percolation, the AHC makes it hard for troublesome anaerobic zones to form.
Fewer blockages as a result of increased pore space
Compared to perlite, sand, and other microscopic particles, the distance between individual rocks or pebbles in aggregates like hydroton is substantially greater.
Even though the biological surface area is usually not as big, the pore space is much bigger.
This means that the larger the pore spaces, the better the percolation (the movement of the solution through the medium) will be.
Clay balls rarely get clogged up, so water can easily flow through them.
For this reason, it is a fantastic choice for aquaponic media bed systems and ebb-and-flow setups.

Eco-friendly
Most people consider clay an eco-friendly medium because it is abundant, and only a tiny amount is needed to generate a cubic foot of hydroton.
In addition, it is far easier on the planet’s resources than other mediums used in larger quantities.
Reusable and simple to use
Luckily, clay pebbles can be used almost indefinitely.
Expanded clay pellets can be used repeatedly unless an excessive amount of salt has built up in them, in which case you should drain and rinse them before using them again.
Hydroton is a loose medium, so it’s easy to move plants and pull them out after being harvested, and this will save you time from manually separating root balls from their medium.
Cons
It is pretty expensive.
Hydroton is easy to use, which makes it a popular choice among small growers.
However, most commercial farmers can’t afford to use it because of how much it costs.
It can cause plumbing problems.
LECA can cause clogs in filters and drain systems because the pebbles float during the first few months until they are thoroughly soaked.
The ability to retain water is sometimes not up to par.
Clay pebbles have a poor water-holding capacity.
Since WHC is responsible for keeping a substrate moist after drainage, a lack of WHC might lead to dry, wilted crops if the water in your system isn’t up to par.
To successfully cultivate high-transpiration or water-intensive crops, growers must devise strategies to maintain a consistently damp substrate.
Most hydroponic farmers won’t need to worry too much about low water-holding capacity (WHC) if they have a great flow to their crops.
How to make expanded clay pellets for hydroponics
Clay pebbles are produced by heating and cooling pre-processed clay in a rotary kiln.
This procedure results in a lightweight expanded clay aggregate (LECA) that is five times its original size.
We hope you’re ready to make your own clay balls!
You’ll need a couple of things first, however.
Step 1: Find out where you can buy or obtain natural clay.
The best people to help you with this are potters.
Commercial hydroton is made from a unique aggregate, but pottery clay does the trick.
Before committing to a larger order, many vendors will offer you a free or discounted sample to try out.
However, if you’re up for an exciting adventure, here’s how to find your clay.
Finding clay often requires a lot of walking, so be ready to go outside and get some steps in.
You’ll need a few pieces of equipment, like a shovel or rock hammer, and a container, like a bucket or a plastic bag, to transport your clay.

The Best Places to Dig
Sometimes you don’t have to dig very far to find clay, and other times you do.
You’re likely walking on clay if you encounter slick spots on the ground or the walkway while you’re out for a stroll after it rains.
Depending on where you live, you could find clay in water sources like lakes, ponds, streams, or even the ocean.
Or even at construction sites (if you’re feeling adventurous)

The quality of clay varies; a simple test can give you an idea of its potential, but you will only know if you try it out and fire some of it.
Below are some tips on how to find suitable clay:
It’s essential to remember that clay can be found in a variety of colors and a variety of states, from wet to dried and everywhere in between.
Depending on the moisture content, it can resemble pebbles or even slate when dry but mud when wet.
If you find dry lumps, use a knife to scrape them off. If the material is clay, the tiniest fragments will easily break away.
Make a little mound with some of this, and check if it dissolves when wet.
Then, roll a bit of the crushed lump into a ball, add water, and see whether it sticks together. If it does, then you know there’s clay in there.
Now here’s the clay test.
Form a little ball by rolling a chunk of the wet clay between your fingers. Make a thin sausage out of it and wrap it around your finger.
If it breaks and is hard to bend, it’s not worth your time.
However, if it holds together and has a plasticky, smooth texture… you’ve discovered usable clay!
While this process sounds great, if you really want to fire your own clay – it’s much more efficient to purchase it.
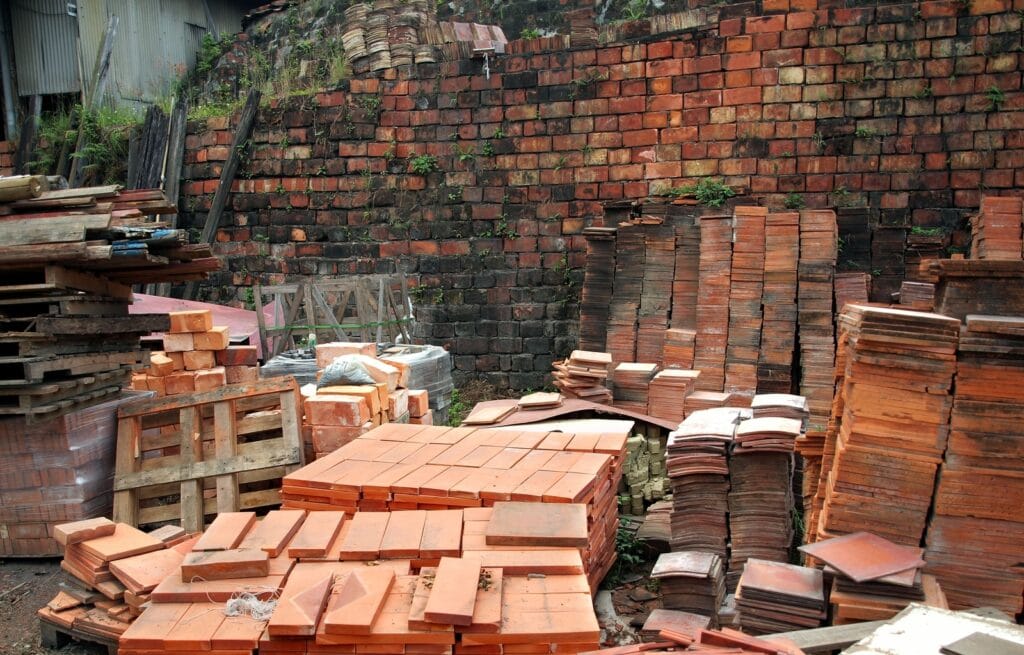
Since you won’t be searching for it if you buy it, LECA is usually made from red clay, like the one below.
Step 2: Forming clay balls
Using your hands, roll out small clay spheres to about an inch in diameter.
To speed up the process, roll the clay into large pieces and cut it into smaller pieces.
It’s okay if your pebbles aren’t perfectly round.

Next, use a toothpick or a matchstick to poke holes in each ball.
Once you’ve crafted your clay balls, it’s time to fire them.
Step 3: Heat your clay pebbles
Heat the pebbles to at least 2000 degrees Fahrenheit in a pottery kiln.
If you don’t have access to a rotary kiln, you will struggle to find equipment that can reach that temperature.
Your kitchen oven can be a weak alternative, but this is the easiest way to fire your clay balls without a kiln.
Of course, there are better options for firing clay on a large scale than this, but it’s an excellent option for small test projects like this.
You can try using a grill with coal to heat your clay balls (ensure you add plenty of charcoal or wood).
Note: We’ve never tried the grill.
Be careful not to overheat the clay in the oven or on coals, or else it may become brittle.
Step 4: Results
Heat your clay balls for several hours, then allow them to cool down. After that, you can take them out and rinse them thoroughly. Note: always remember to soak your pebbles before use.
And there you have it! Now your clay balls are ready for use.
What You Need to Know Before Using Hydroton or Clay Pellets
- When using expanded clay pellets in a garden, it’s essential to rinse and soak them to remove any dust or dirt that may have settled inside the pores. You can wet the pellets with a pail of water; however, you may need to rinse them again.
- Before planting them in the ground or a container, please give them a healthy dose of the nutrient-rich solution you choose.
- Don’t let your clay balls get completely dry: It takes a long time for hydroton to become completely soaked. And when it’s dry, it can take the water from your plants, which could kill them.
- Sterilize before reuse: Many hydroponic farmers use hydroton repeatedly to grow seedlings and clones. It is, however, essential to note that these balls are highly susceptible to bacteria, fungi, and other microorganisms. So, ensure you disinfect the pebbles with hydrogen peroxide or isopropyl alcohol before reusing them.
Final Thoughts
The versatility of clay pebbles as a growing medium is unparalleled.
They are light, provide excellent aeration, and are entirely natural!
Clay is readily available and has no negative environmental impact, so growers who care about sustainability should experiment with it instead of other alternatives.
It’s simple to set up and use and highly beneficial to your hydroponic and aquaponic gardens.
Other Articles
Ready to jump in with your hydroponic garden and start growing some REAL PLANTS?
Check out
- Best Hydroponics System For Vegetables
- Best Hydroponics System for Strawberries
- Best Hydroponics System For Lettuce
